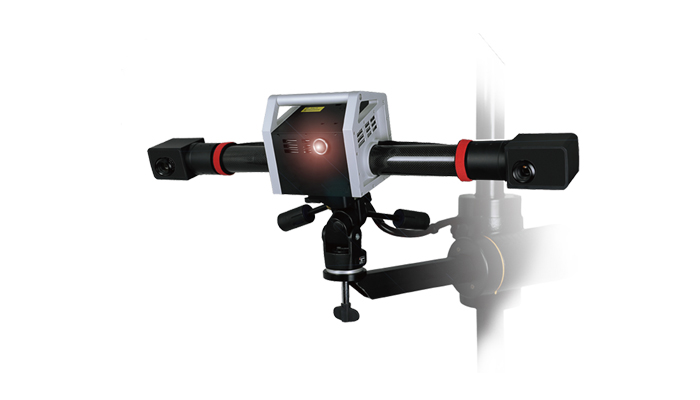
3D scanner technology
3D scanner technology generally uses the output data of digital measurement equipment as the original information source. Only after obtaining the three-dimensional surface information of the entity to be reversed can subsequent work, such as model detection, modeling, evaluation, improvement and manufacturing of complex surfaces, be achieved. The quality of the measurement method directly affects the accuracy and completeness of the description of the measured entity, affects the speed of digital entity geometric information, and then affects the quality of the reconstructed CAD surface and entity model, and ultimately affects the quality of the entire project. Progress and quality. Therefore, in the entire chain, it is at the beginning of the entire project, so it is the basis of the entire project and a key technical part of the technology.

Data collection methods
The data collection method of 3D scanner, that is, the three-dimensional surface data collection method, can be divided into two categories: contact type and non-contact type.
Contact measurement methods include: coordinate measuring machines and chromatography.
Non-contact measurement methods include: optical measurement, ultrasonic measurement, electromagnetic measurement and other methods.
Various measurement methods have their own characteristics. The coordinate measuring machine is a large and precise three-dimensional coordinate measuring instrument that can measure the spatial dimensions of workpieces with complex shapes.
Main advantages and disadvantages of 3D scanners
The main advantages are high measurement accuracy and strong adaptability, but the fatal weakness of contact probe measurement is that the measurement speed is too slow, the measurement efficiency is too low, and some soft surfaces cannot be measured. Therefore, it is somewhat unable to respond quickly to manufacturing.
Interference and laser diffraction
Interferometry calculates the height distribution of an object by measuring the optical path difference between two beams of coherent light. The measurement accuracy is quite high, but the measurement range is small and the anti-interference ability is weak. It is not suitable for measuring complex curved surfaces with large concave and convex changes. The situation of laser diffraction method is basically the same as that of interference method.
Chromatography
Tomography is a technology developed in recent years. After filling the prototype of the part under study, a method combining layer-by-layer milling and layer-by-layer optical scanning is used to obtain the internal and external contour data of the sections at different positions of the part prototype, and then combine them to obtain 3D data of the part. The advantage of the tomography method is that it can measure the internal and external contours of any shape or structural parts, but the measurement method is destructive.
Laser scanning method based on optical triangle principle
This measurement method uses laser as the light source based on the optical triangulation measurement principle. Its structural pattern can be divided into light spots, single lines, multiple light strips, etc., which are projected onto the surface of the measured object, and photoelectric sensitive elements are used on another side. The position receives the reflected energy of the laser, and calculates the depth information of the object through the relationship between the base plane, image point, image distance, etc. of the measured object based on the offset of the light point or light strip imaged on the object.
Non-contact 3D scanner
The key to non-contact 3D scanner measurement technology is the accuracy and accuracy of spatial feature point extraction and matching in multiple digital images. The method of creating measurement features by projecting structured light with spatially encoded features onto the surface of the measured object effectively solves the problem of measurement feature extraction and matching. Structured light projection measurement method is considered to be the best method in three-dimensional shape measurement at present. Its principle is to project a light source with a certain pattern, such as a grid-shaped light strip, onto the surface of an object, then use two lenses to acquire images from different angles, and obtain the three-dimensional coordinates of the pixels on the entire image through image processing. This non-contact 3D scanner method has the advantages of being fast and requiring no moving platform.
Research state in China
At present, China is also improving on the basis of foreign non-contact mechanical optical three-dimensional scanners. The non-contact mechanical optical three-dimensional scanner produced surpasses the same foreign equipment in various parameters.